Monday, December 31, 2018

Playing bounty bob strikes back in ubuntu

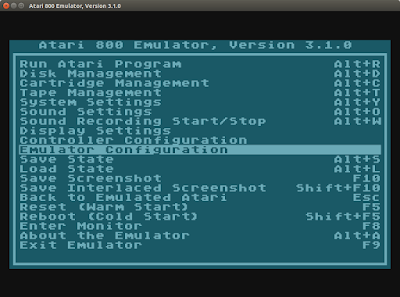
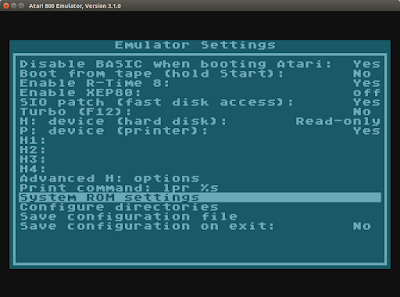
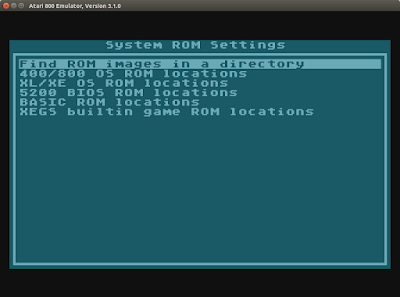
I got inspired to play Bounty Bob Strikes Back by watching youtube videos of longplays. I thought I'd try mame and the a800 driver but it crashed on trying to run the cartridge. I found an xex file but mame doesn't like xex files. So I installed the atari800 emulator under Ubuntu with "apt get install atari800" and it installed but getting the rom paths right was a little tricky. You launch atari800 and then hit F1 to configure, then Emulator Rom Settings, then System Rom Settings and then Find Rom Images in a Directory and then locate where you extracted the atari roms to. It installs a man page so you can type "man atari800" and the config file is ".atari800.cfg" in your home directory.


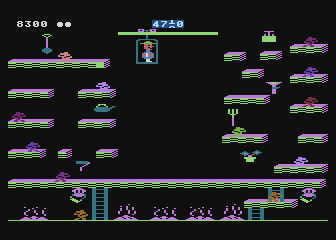
Unfortunately the atari800 emulator doesn't work properly. You can run the game but the Utility Lift on Level 2 doesn't work. And if you do the cheats listed at http://www.bigfivesoftware.com/emulator/emulator.htm you can jump to different levels but many others don't work correctly either.

My command line looks like this:

atari800 -run ~/Downloads/Bounty\ Bob\ Strikes\ Back\!.xex

and I had to remap the joystick to my preferred CTRL (fire button) and ARROW KEYS arrangement and also remember to save the configuration.

Stuck on level 2:


Bounty Bob Strikes Back! - Cheat Code

Press F3 to enter the option screen.
Use the down arrow to move to the "Special Code" line.
Use left/right arrows to select 61800. Holding ESC will cause the numbers to advance more quickly.
Hold the "F" key on the keyboard and press F3.
Now when you're playing the game you can type any two numbers to jump directly to that level. For example type "05" for level five.

(under the Atari800 emulator, F2=option, so hit F2 to go to the option screen, then go to the special code line and decrement the number to 61800. If you want to go "turbo" F12 will go into a turbo mode so it will count faster, however you are also likely to "time out" of the options screen. Just leave turbo mode with F12, hit F2 again, then select the special code line again and set it to exactly 61800 and hold down f and press F2. Now cheats should be enabled and the special code line will return to zero)


So let's try the c64 driver under mame. I was able to get bounty bob to work, but not with the softlisted disk. I found an Avatar crack that worked and even better it's got trainers!

The softlisted floppy bbsb gives a CHECKSUM ERROR.
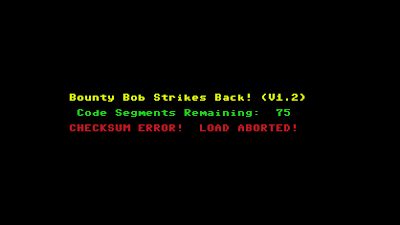


The avatar crack works and I don't even have to enter the cheat code if I enable in game keys:

My favorite is F to reposition Bounty Bob. For some reason I had to disable joystick 2 to get the F key to work since it's mapped to ARDFG by default. That's why the command line has -joy2 "" in it.
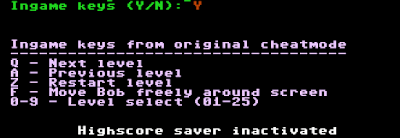
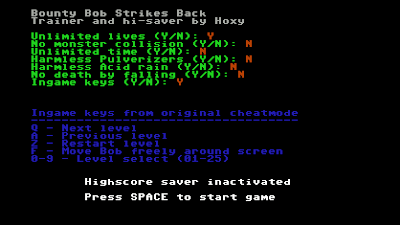
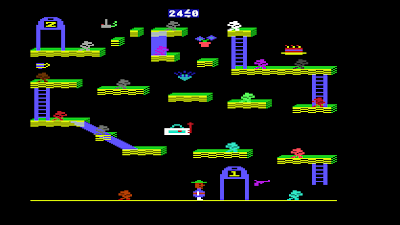


./mame64 c64 -window -bios jiffydos -joy1 joy -joy2 "" -flop1 ~/Downloads/Bounty\ Bob\ Strikes\ Back\ \ 7HD.d64

I like the jiffydos bios so I can just hit SHIFT+HOME for (SHIFT+RUN/STOP) and it will load it up, as well as getting a directory with F1.
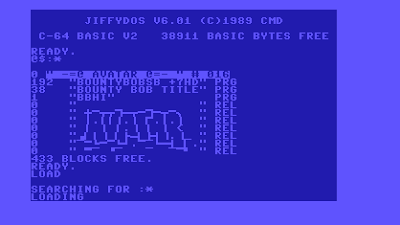


The c64 version runs a bit too fast to be properly controlled for me. If I launch mame with a speed factor of 0.80 (80 percent normal speed) the controls are much easier to handle and less touchy.

./mame64 c64 -window -flop1 ~/Downloads/Bounty\ Bob\ Strikes\ Back\ \ 7HD.d64 -bios jiffydos -joy1 joy -joy2 "" -speed 0.80


Ahh bliss!

Thursday, December 20, 2018

How small can you make a barcode in Word?

I wanted to see just how small I could make a readable printed barcode in Word so I wrote a VBA macro to generate barcodes at different sizes to test it out.


Wednesday, December 19, 2018

Lovelite by O'Bryan on Rock N America

Saturday, November 26, 2016
Trying to find things that you've seen long ago

Like this music video that I think aired on the show "Rock'n America" back in the 80s where this gal in this yellow jumpsuit was in some kind of power plant pulling levers up and down. I'm still trying to figure out what that one was. I vaguely remember it being called Love lines or something like that.

The obscure things that you remember and you want to put a name with them.

Well I finally found out what the name of the video was: It's Lovelite by O'Bryan, not Lovelines.

I found a video of Rock N America where he talks about being in a video by O'Bryan and that's all I needed.


The comedy bits were corny but funny. "Know where I can get ahold of any Rock N America?"

I always loved those music video shows like Friday Night Videos, Rock N America and Night Tracks.

Just search youtube for this title: O'Bryan - Lovelite 1984

Why no barcode tag in HTML?

After having so much fun fiddling with Microsoft Word's DISPLAYBARCODE field, I wondered why HTML doesn't have a standard barcode tag. I suppose there's lots of javascript barcode generators, but why not one built in to the browser?

It would be so simple if all you have to do is go <barcode type="code128">BARCODE_DATA</barcode>

I suppose it's not an original thought:

http://jimkeener.com/posts/barcode-html-tag

Monday, December 17, 2018

Discovered MS Word's DISPLAYBARCODE ability

Today I discovered that Word has the ability to display and print barcodes in a document. Yes!

All you have to do is to create a field with Ctrl+F9 and type

DISPLAYBARCODE "BarcodeData1234" CODE128 \t

If you want a smaller code, you can give a height parameter in "twips" 1/1440ths of an inch.


DISPLAYBARCODE "BarcodeData1234" CODE128 \t \h 720

Hit Alt+F9 to toggle the field codes display between barcode and field text.

Beautiful!!


A list of parameters:

https://msdn.microsoft.com/en-us/library/hh745901(v=office.12).aspx


And you can do all the following barcodes:

UPCA|UPCE|JAN13|JAN8|EAN13|EAN8|CASE|ITF14|NW7|CODE39|CODE128|JPPOST|QR


https://hubpages.com/technology/Mail-Mergeable-Barcodes-in-Microsoft-Word-2013-aka-Bar-Codes

Saturday, December 15, 2018

My EDID was going unrecognized until I added video=VGA-1:e

Some strange behavior from my xorg with Ubuntu 18.04:

I have a firmware file set up so that grub will load a firmware "helper" file for my hanns-g 24" monitor.

I put on a VGA extender SR from Gefen to test it out and for some reason it doesn't pass the EDID, which is ok because I've got the kernel parameter drm_kms_helper.edid_firmware.
(BTW the signal from the VGA extender looks pretty awesome for a long cable run).


For some strange reason, it didn't work until I added video=VGA-1:e (which is supposed to enable the VGA-1 output).

Until I added the parameter video=VGA-1:e I would get this dialog upon boot when it tried to restore my previous display settings:


$ cat /proc/cmdline
BOOT_IMAGE=/boot/vmlinuz-4.15.0-42-generic root=UUID=xxx-yyyy-zzzz ro drm_kms_helper.edid_firmware=VGA-1:edid/hannsg.bin drm_kms_helper.edid_firmware=VGA-1:edid/hannsg.bin video=VGA-1:e

Keen eyes will notice I put the drm_kms_helper.edid parameter in there twice by accident, I just left it in there, it doesn't seem to hurt anything. The last parameter on the line seems to take precedence.

I also tried drm_kms_helper.edid_firmware=VGA-1:edid/1920x1080.bin for one of the built-in edids which also worked, and gave ONLY the 1920x1080 resolution.


and running xrandr --verbose shows my EDID is getting read.


$ xrandr --verbose
Screen 0: minimum 320 x 200, current 3120 x 1920, maximum 8192 x 8192
VGA-1 connected primary 1920x1080+1200+510 (0x46) normal (normal left inverted right x axis y axis) 521mm x 293mm
Identifier: 0x42
Timestamp: 60227
Subpixel: unknown
Gamma: 1.0:1.0:1.0
Brightness: 1.0
Clones:
CRTC: 0
CRTCs: 0 1 2
Transform: 1.000000 0.000000 0.000000
0.000000 1.000000 0.000000
0.000000 0.000000 1.000000
filter:
EDID:
00fffffffffff etc.


It's pretty important that my system comes up properly on first boot because the monitor rotation seems to freak out the i915 driver with my dual monitor setup if I switch back and forth between monitor rotation and normal and I get all kinds of weird display corruption and flickering after that. If it comes up "clean" the display looks fine.

Thursday, November 29, 2018

Why some USB WD 4TB and above don't work on windows 2000

I have a hard time letting go of my old systems. I don't hook it up to the internet anymore but I keep my old windows 2000 system running since it's all set up the way I like it and it runs sweetly in 1GB.

Anyway, I digress, I would try some USB WD 4TB drives on this system and some would work and others wouldn't work at all.

I finally found the answer.

It has to do with old style DOS partition tables and 512 byte sector sizes.

See, an old style DOS partition table would hold a 32 bit value for the number of sectors, that being 2^32 or 4G sectors.

Now the old hard drives had 512 byte sectors so the max partition size would be 2^32 * 512 bytes = 2.1 TB or 2TB.

If we had a 4096 byte sector, the max partition size would be 2^32 * 4096 bytes = 17592186044416 or 16TB.


I had one drive that didn't work under windows 2000 and plugging it into a linux box, "fdisk -l" told me that it had 512 logical but 4096 physical. So it's actually 4096 byte sectors but it's pretending to be a 512 byte sector for compatibility.

So how to get it to do the 4096 byte sectors? Use the WD Quick Formatter utility:


How to format external drives using WD Quick Formatter in Windows ...

https://support.wdc.com/knowledgebase/answer.aspx?ID=3868

If you format the drive in "XP Compatible" mode it will put the drive into a 4096 byte sector size.


After running the utility and plugging it into a linux box, fdisk tells me that this is a 4096/4096 drive.


Doing this to a 10TB drive WD from bestbuy's black friday sale...

Disk /dev/sdc: 9.1 TiB, 10000831348736 bytes, 2441609216 sectors
Units: sectors of 1 * 4096 = 4096 bytes
Sector size (logical/physical): 4096 bytes / 4096 bytes
I/O size (minimum/optimal): 4096 bytes / 4096 bytes
Disklabel type: dos
Disk identifier: 0xd841c1a1

Device Boot Start End Sectors Size Id Type
/dev/sdc1 256 2441609215 2441608960 9.1T 7 HPFS/NTFS/exFAT


One mystery solved that has bothered me for a while.

Monday, November 26, 2018

Extending a short pencil with a piece of paper

Here's an idea: You take a piece of paper and use it to make a short pencil longer.

Just take a small piece of paper and wrap it tightly around a pencil, then use a piece of tape to fasten the roll so it doesn't unroll.


Ta da! Instant longer pencil.


And you can do lots of variations.


You can even do things like join two short pencils with a paper roll cylinder.

Experiment!

Making labels for the stove

One of the things I always seem to mess up is which burner goes with which switch. Is it the front burner or the back burner? I don't know why I always seem to get it wrong. So I made some P-touch labels to help me out.

I just use the arrow tip from the Wingdings font (using the Character Map accessory to find the right character to paste) and then make a solid box in the P-touch editor for the long part of the arrow.

Now I don't have to think so hard, I can see which burner goes with which switch at a glance.

Thursday, November 22, 2018

Solar charging up my Logitech K750 keyboard without the sun

I've got one of these Logitech K750 keyboard with solar panels on it, but I really don't have sunlight in my computer room.

I take one of my desk lamps and move it very close to the top of the keyboard's solar panels. That seems to work pretty well since it has one an LED bulb. You probably wouldn't want to get it too close to an incandescent bulb because of the heat.

I also tried it with my solar ikea "sunnan" desk lamp to charge up the module. It also works with my solar keychain light.

Sure it's a bit inefficient but what do you do in the winter when the sun isn't shining?

https://www.quora.com/Can-you-charge-a-solar-cell-by-using-a-light-bulb-or-LED

Friday, November 16, 2018

Got a Ptouch PT-18R - does it have Factory Mode? Yes.

I got a Ptouch PT-18R which is a pretty neat little unit. It's very compact which is nice. It's not that much bigger than the print cartridge, and it has an auto-cutter and USB PC interface.


Unfortunately, I didn't get the rechargeable battery or the charging dock with it, but I don't really need it anyway since I run it off an AC adapter.

It doesn't turn itself on when you print from the computer so you have to make sure to turn it on.

And it has "Factory Check Mode".

Power up with CODE+R to reset the settings, turn it off, the power up with CODE+K and you should be in factory check mode.

1 HEAD C / volt X ACSENS O
2 Country Set
3 Display check
H pattern
checkerboard
checkerboard inverted
solid black
LCD adjust from -4 to +4 with up/down arrow keys
4 Cassette pins
5 Cut
6 Key
7 Print 1
8 Print 2
9 Motor
0 ACSENS X AD CHECK START
E Encoder (num keys to exit) (1zx to exit to FACTORY CHECK)
U USB ID DSP (usb id display) (ESC to exit)
H H-C Len 158 (???) (ESC to exit)
V Version Info MAIN 1.01 CHAR SET .77 BOOT .77 (ESC to exit)


It's interesting that ESC or Backspace doesn't always exit from some option, from the Encoder I have to type 1ZX (that's 1 (number one) Z X) to get back to FACTORY CHECK. The state machine navigation is a bit inconsistent.

My 4k TV doesn't support resolutions between 1920x1080 and 3840x2160

My Vizio d50u-d1 will do 4k but doesn't seem to like anything in between 1920x1080 and 3840x2160 displaying NO SIGNAL.


I wish it'd do

1.33x = 2560x1440 or
1.5x = 2880x1620 or
1.66x = 3200x1800

but it doesn't like those resolutions at all.

I thought I'd also try an interlaced signal at 3840x2160 that would allow 24hz to go to 48 hz.

$ ./cvt 3840 2160 48 -i -r -x

# 3840x2160 @ 48.00 Hz Interlaced Reduced Blank (CVT)
# field rate 48.00 Hz; hsync: 53.06 kHz; pclk: 212.25 MHz
Modeline "3840x2160_48.00i_rb" 212.25 3840 3888 3920 4000 2160 2163 2168 2185 Interlace +HSync -Vsync

$ xrandr --newmode "3840x2160_48.00i_rb" 212.25 3840 3888 3920 4000 2160 2163 2168 2185 Interlace +HSync -Vsync
$ xrandr --addmode HDMI-1 "3840x2160_48.00i_rb"
$ xrandr --output HDMI-1 --mode "3840x2160_48.00i_rb"

Sadly, "NO SIGNAL" was the result.

Oh well, it can do 25hz at 3840x2160 rock solid on my integrated intel graphics 2500 so I'm still happy. I sit in front of that 50" 4k screen and I feel like Tiny Elvis. Man, that thing is huge!

Tuesday, November 13, 2018

Dune BD Prime 3.0 works well with USB wireless keyboard

I got this cool Dune BD Prime 3.0 combo blu-ray disc and media player without a remote but I got it to work with a USB wireless keyboard.

Here's a list of what I could get to work:

while the player is running:

vol +/- and mute buttons work

ff, rew work

arrow keys and enter

A B C D =f9 f10 f11 f12

select = insert or f4

number keys = track number (type them quickly for a two digit number)

end = return to menu

A = audio sync
D = subtitle on/off (doesn't work unless you first activate subtitles)

menu key on keyboard works to bring up menu (the context menu key next to the right control key)

f5,f6 = angle
f3 = goto time

scroll lock = deinterlace settings

double hit of delete key acts as though you reloaded the disc

ESC = drop out of menu

f1 = info

pause = pause

music button = audio track


I wish every media player would work with a usb keyboard.

It'd also be great if they could add a few more keystrokes to make it more functional and ergonomic, like greater than and less than could do 2x/4x/8x forward/reverse play, s could cycle through available subtitles, spacebar could be play/pause, etc. Just a few additional keystrokes would make a huge difference in usability.

Monday, November 12, 2018

Trying out 4096x2160 resolution

I thought I'd run a "sudo get-edid | parse-edid" and see what my 4k tv actually says:

Note that it says maximum pixel clock is 300mhz since I'm connecting to one of the HDMI ports that maxes out at 4k@30hz.

sudo get-edid -b 5 | parse-edid
5
This is read-edid version 3.0.2. Prepare for some fun.
Attempting to use i2c interface
Only trying 5 as per your request.
256-byte EDID successfully retrieved from i2c bus 5
Looks like i2c was successful. Have a good day.
Checksum Correct

Section "Monitor"
Identifier "D50u-D1"
ModelName "D50u-D1"
VendorName "VIZ"
# Monitor Manufactured week 0 of 2015
# EDID version 1.3
# Digital Display
DisplaySize 1100 620
Gamma 2.20
Option "DPMS" "true"
Horizsync 15-80
VertRefresh 25-76
# Maximum pixel clock is 300MHz
#Not giving standard mode: 1920x1080, 60Hz

#Extension block found. Parsing...
#WARNING: I may have missed a mode (CEA mode 93)
#WARNING: I may have missed a mode (CEA mode 98)
#WARNING: I may have missed a mode (CEA mode 95)
#WARNING: I may have missed a mode (CEA mode 100)
Modeline "Mode 11" 148.50 1920 2008 2052 2200 1080 1084 1089 1125 +hsync +vsync
Modeline "Mode 0" 297.00 3840 4016 4104 4400 2160 2168 2178 2250 +hsync +vsync
Modeline "Mode 1" 148.50 1920 2008 2052 2200 1080 1084 1089 1125 +hsync +vsync
Modeline "Mode 2" 25.200 640 656 752 800 480 490 492 525 -hsync -vsync
Modeline "Mode 3" 27.027 1440 1478 1602 1716 480 484 487 525 -hsync -vsync interlace
Modeline "Mode 4" 27.027 1440 1478 1602 1716 480 484 487 525 -hsync -vsync interlace
Modeline "Mode 5" 27.027 720 736 798 858 480 489 495 525 -hsync -vsync
Modeline "Mode 6" 27.027 720 736 798 858 480 489 495 525 -hsync -vsync
Modeline "Mode 7" 74.250 1920 2008 2052 2200 1080 1082 1087 1125 +hsync +vsync interlace
Modeline "Mode 8" 148.500 1920 2008 2052 2200 1080 1084 1089 1125 +hsync +vsync
Modeline "Mode 9" 74.250 1280 1390 1420 1650 720 725 730 750 +hsync +vsync
Modeline "Mode 10" 74.250 1920 2558 2602 2750 1080 1084 1089 1125 +hsync +vsync
Modeline "Mode 12" 74.25 1280 1390 1430 1650 720 725 730 750 +hsync +vsync
Option "PreferredMode" "Mode 11"
EndSection


and I wondered what the CEA modes meant:

https://en.wikipedia.org/wiki/Extended_Display_Identification_Data

has a nice table that says that mode 100 is 4096x2160@24 for CEA mode 98.

So let's see if we can set that up.

I downloaded cvt.zip from riscosports.co.uk and compiled it with:

gcc cvt.c -o cvt -lm

and then used it to get a modeline for 4096x2160@24

./cvt

Description: This program generates video timing descriptions using formulas
from the VESA "CVT" (Coordinated Video Timing) v1.1 specification, based
itself on the earlier VESA "GTF" (Generalized Timing Formula) v1.0
specification.

usage: ./cvt x y refresh [-v|--verbose]
[-r|--reduced-blank] [-i|--interlaced]
[-f|--fbmode] [-s]|--romode] [-x|-xf86mode]

x : the desired horizontal resolution (required)
y : the desired vertical resolution (required)
refresh : the desired refresh rate (required)
-v|--verbose : enable verbose printouts (traces each step of the computation)
-r|--reduced-blank : use "Reduced Blanking" timings
-i|--interlaced : generate an Interlaced video mode
-f|--fbmode : output an fbset(8)-style mode description
-s|--romode : output an riscos-style mode description (this is the default
if no mode description is requested)
-x|-xf86mode : output an XFree86-style mode description


./cvt 4096 2160 24 -r -x

# 4096x2160 @ 24.00 Hz Reduced Blank (CVT)
# field rate 23.98 Hz; hsync: 52.40 kHz; pclk: 223.00 MHz
Modeline "4096x2160_24.00_rb" 223.00 4096 4144 4176 4256 2160 2163 2173 2185 +HSync -Vsync


xrandr --newmode "4096x2160_24.00_rb" 223.00 4096 4144 4176 4256 2160 2163 2173 2185 +HSync -Vsync
xrandr --addmode HDMI-1 "4096x2160_24.00_rb"
xrandr --output HDMI-1 --mode "4096x2160_24.00_rb"

and it works, the only thing I notice is that there is one vertical pixel line that seems a little weird in the middle, repeating a couple of pixels otherwise it looks great.. The native resolution of the TV is 3840x2160 so I would expect a few lines to be dropped.


Here's a bunch of reduced blank cvt modelines for different hz values so I don't have to fire up cvt again if I want to do a little experimenting.


4k split screen clone test

Ok, so I can make a double tall scrolling screen, let's see if we can get a side by side clone view going.

I go into ccsm and make an output region that's 1920x2160 for the upper left quadrant, a 1920x2160 for the lower left quadrant, and a 1920x2160 for the upper right quadrant, then just use the compiz clone to clone the lower left quadrant into the upper right quadrant. Just Shift+WIN (super) click and drag on the lower left quad and drag up to the upper right.

I open my browser window and resize to fit and voila, I can see the upper left quad and lower left quad at the same time. Scrolling the webpage with the scroll wheel updates the clone as you'd expect.

The video drivers and compiz don't refresh the screen properly and it flickers sometimes, and there's some weird double/triple buffer jitter effects. It would be awesome if this were seamless.

It also helps to have a "regular" 1920x1080 monitor as your primary monitor on the left when you're messing around with additional screens.


So now you can view a double tall webpage in a "two page view".


A screenshot of the entire screen shows my regular 1920x1080 monitor area on the left, the left side 1920x4320 region and the upper right 1920x2160 region that is cloned from the lower half.


Panning a double high 4k screen with xrandr

I wanted to see if I could make a double high 4k screen and pan up and down.


xrandr --output HDMI-1 --panning 3840x4320+1920+0 --fb $((1920+3840))x$((2160*2))

I've got a 1920x1080 regular HD monitor on the left and a 4k monitor on the right.

The screen size gives me 3840x4320 (double high 3840x2160) with an offset of +1920+0 to position it to the right of the 1920x1080 monitor.

Then we set the size of the framebuffer to 5760x4320 using bash to do a little math for us, but putting a math expression in between a dollar sign and double parenthesis $(( )).

After I execute this, xrandr reports these stats, I guess I could go up to a maximum 8192x8192 framebuffer size.

xrandr
Screen 0: minimum 320 x 200, current 5760 x 4320, maximum 8192 x 8192
VGA-1 connected primary 1920x1080+0+0 (normal left inverted right x axis y axis) 521mm x 293mm
1920x1080 60.00*+
...
HDMI-1 connected 3840x4320+1920+0 (normal left inverted right x axis y axis) 1096mm x 616mm panning 3840x4320+1920+0
1920x1080 60.00 59.94 24.00 23.98
1920x1080i 60.00 59.94
3840x2160_24.00_rb 24.00*
...

It's interesting to see the output lines in ccsm, they get updated to reflect the new size when detect outputs is checked.


https://sfxpt.wordpress.com/2011/02/02/panning-using-xrandr/

Saturday, November 10, 2018

Splitting the 4k tv into sections

So I was using a firefox web browser on ubuntu 18.04 displaying on the 4k tv and it seems that most webpages don't use all of the screen real estate, tending to have a narrow band in the middle.

I wish that I could divide the monitor into 2 or 3 columns with a long web page. It should theoretically be possible to "reconfigure" a regular 3840x2160 monitor into 2 strips of 1920x2160 so that it could "pretend" to be a really tall 1920x4320 monitor, displaying the 2 strips side by side instead of vertically. That would be a neat trick.


Unfortunately, I've only figured out how to divide the monitor space into "regions" with compiz.

It's still pretty cool though.

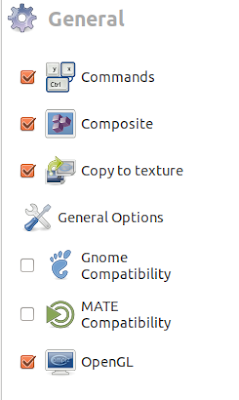
You instal compizconfig-settings-manager and launch it with ccsm.

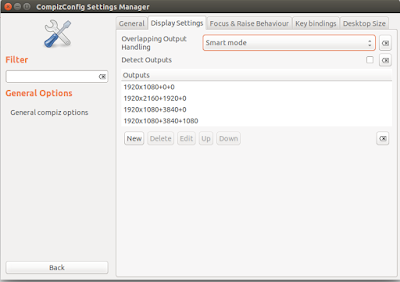
Click on General Options and go to Display Settings tab.

Then uncheck Detect Outputs and then modify the output lines.

I've got two monitors, one HD and one 4k monitor.

The first line is the left HD monitor, 1920x1080+0+0.

The second line is a vertical strip on the 4k monitor, 1920x2160+1920+0.
The third line is a 1920x1080 size block on the upper right side of the 4k monitor, 1920x1080+3840+0
The fourth line is a 1920x1080 size block on the lower right side of the 4k monitor, 1920x1080+3840+1080.


https://askubuntu.com/questions/1001444/virtual-split-screen-on-ubuntu


I also discovered the "Clone Output" compiz plugin which is pretty cool, I just install with "sudo apt install compiz-plugins-extra" and then run ccsm to enable the "Desktop/Clone Output" plugin, then use Shift+super+Button1 to activate (Shift+windows key) and click on the screen to clone and drag it to another screen. It works pretty well, resizing the window to fit the size of the other screen.

http://forum.compiz.org/viewtopic.php?t=123&f=114


Now if I could just make a super tall 1920x4320 virtual monitor and "clone" the top and bottom halves to the left and right halves of a 3840x2160 monitor.

Thursday, November 8, 2018

Got a 4k tv but my integrated video can't make a 4k signal...or can it?

Well, I finally got a 4k tv, but now I've realized that no piece of computer equipment that I have will make a 4k resolution signal...

Or so I thought...

I read this page about going to 3840x2160 resolution with cvt and reduced blanking and thought I'd give the modeline a go:


https://superuser.com/questions/1323967/how-can-i-set-display-resolution-to-3840x2160-with-intel-graphics-3000/1323969#1323969

Also I found some interesting stuff at: https://medium.com/@ValdikSS/how-to-use-high-resolutions-with-older-hardware-58577d91b1f8


Using the modeline from 3840x2160 24 reduced blanking and it works!!!

xrandr --newmode "3840x2160_24.00_rb" 209.75 3840 3888 3920 4000 2160 2163 2168 2185 +HSync -Vsync
xrandr --addmode HDMI-1 "3840x2160_24.00_rb"


I can play youtube at 1440p, 2160p seems to tax my system too much, and it looks beautiful!

Xrandr says that it's an HDMI port but it's a DVI port on the back of the computer and I'm using a DVI to HDMI cable.


lspci says I have

00:02.0 VGA compatible controller: Intel Corporation Xeon E3-1200 v2/3rd Gen Core processor Graphics Controller (rev 09)

Ubuntu 18.04 says that I have a Intel® Core™ i3-3220 CPU @ 3.30GHz × 4 and my graphics are Intel® Ivybridge Desktop.

According to intel's website the i3-3220 has Intel® HD Graphics 2500.

I don't know exactly what the maximum pixel clock is for the HD Graphics 2500, but according to https://www.x.org/docs/intel/IVB/IHD_OS_Vol3_Part4.pdf Ivy Bridge it's limited to 225 mhz which is just above the 209.75 dot clock in the 3840x2160_24.00_rb modeline. I'll bet I could get 25 fps instead of 24 to fit just under 225 mhz. For now, it's totally stable so I'm really happy.

Wednesday, November 7, 2018

VBA subtleties

So I'm fiddling with VBA under an old version of Excel and I want to use the file system object.

First you have to "create" an fso with:


set fso = createobject("Scripting.FileSystemObject")


Once you do this you can start using ths filesystemobject.

We can get a folder reference like this:

set myfol = fso.GetFolder("TESTFOLDER")


and I've created a folder called TESTFOLDER that we can access in the same directory where I've put my excel file.

And let's try passing a folder variable to a subroutine.

sub test_passing_folder(afolder)
debug.print afolder
end sub


and we can call it with


ThisWorkbook.test_passing_folder(myfol)

and we get a result like:

G:\TESTFOLDER


printed to the immediate window.

but what is the actual type? Is it a folder or a string? Let's print the typename too.


sub test_passing_folder(afolder)
debug.print afolder, typename(afolder)
end sub


and lets call it with parentheses around myfol.

set myfol = fso.GetFolder("TESTFOLDER")
thisworkbook.test_passing_folder(myfol)

and we get this:

G:\TESTFOLDER String


but why is it a string?

because I put the subroutine call in parentheses which converted it into a string.

Now let's try calling it without parentheses:


set myfol = fso.GetFolder("TESTFOLDER")
test_passing_folder myfol

and we get

G:\TESTFOLDER Folder

I'm so used to calling functions in other languages where you wrap the parameters in parentheses that I naturally put them in, but in this case, it converts the folder into a string.

Here's a quick test that you can type into the VBA immediate window:

set fso=createoject("scripting.filesystemobject")
debug.print typename(fso)
FileSystemObject

ThisWorkbook.test_passing_folder fso.GetFolder("TESTFOLDER")
G:\TESTFOLDER Folder

? typename(fso.getfolder("TESTFOLDER"))
Folder
? typename((fso.getfolder("TESTFOLDER")))
String


Why does it convert it to a string? I think because the parentheses trigger a default conversion to Folder.Path. If you go to the Object Browser in VBA and find the Folder type and choose Path it will say in the description that Path is the default member of the Scripting.Folder object.


The other thing that I've got to remember is to use "SET" when dealing with objects.

fso=createobject("scripting.filesystem")

doesn't work.

You have to use the set keyword.

set fso=createobject("scripting.filesystem")

Monday, October 8, 2018

Getting my Analog TV card to work in Ubuntu 18.04


I got a couple of old Analog TV cards and thought I'd chuck 'em into a Ubuntu 18.04 box and see if I could get TV to work.

Ubuntu finds them just fine, one's a BT878 [109e:036e] and the other is a CX23880/1/2/3 [14f1:8800].

I usually get VLC to open up the TV card to see if it's working:

vlc v4l2:///dev/video0 :v4l2-standard=NTSC :v4l2-tuner-frequency=61250 --crop 16:9 :live-caching=0 --zoom 2.2 --aspect-ratio 16:9


looks pretty decent since I'm getting the analog cable signal on channel 3 from the DTV adapter.

but the first video card on /dev/video0 seems to be getting a lot of interference and it looks terrible with hum bars all over the place.

Let's try the other video card on /dev/video1

vlc v4l2:///dev/video1 :v4l2-standard=NTSC :v4l2-tuner-frequency=61250 --crop 16:9 :live-caching=0 --zoom 2.2 --aspect-ratio 16:9

The video looks great, no interference, but now we've got another problem: only the top half of the tv screen is showing...I don't know why.

so let's try tvtime (which can be installed with "sudo apt install tvtime")

and it looks pretty good with:

tvtime -d /dev/video1 -c 3 -M -g 1920x1080


This looks pretty decent: -c 3 gets channel 3 -M is windowed and -g 1920x1080 gives me a window that fills my monitor.


So the video is fine, what about sound?

For some reason, the audio quality with tvtime stutters all over the place. So let's try using the Line-out from the TV card and piping that to the line-in of the onboard sound card.

But you go to the Ubuntu sound control panel and you can't get the line in stuff to work.


I installed pavucontrol with "sudo apt install pavucontrol" and running pavucontrol didn't help me fix it.

I had to issue this command:

pacmd load-module module-loopback

which is a bunch of pulse audio voodoo to pump the sound card line in to the sound card output.

If this seems wayyy too hard, it is. Getting stuff like this to work in Windows is so simple. I can see why people get frustrated with linux. You just go to sound properties and monitor the line out with two clicks.

Everything works pretty smoothly, but I have problems after I go into standby. When I come back out of standby the tvtime window is all screwed up with funky patterns instead of the video. I have to close tvtime, launch vlc and then reload tvtime.

So after I come out of standby I run this command: It launches vlc to init my /dev/video1, drops out after 2 seconds, then launches tvtime on /dev/video1.

timeout 2 vlc v4l2:///dev/video1 :v4l2-standard=NTSC :v4l2-tuner-frequency=61250 --crop 16:9 :live-caching=0 --zoom 2.2 --aspect-ratio 16:9; tvtime -d /dev/video1 -c 3 -M -g 1920x1080


Also I've noticed that if I leave the tv card running and go to standby, I will sometimes crash when coming out. So I'm closing the tv card when I go to standby. It seems that if you go with anything other than your normal video card and audio that standby gets a little flaky. It's gotta come back out of standby 100% of the time!


Monday, September 10, 2018

Counting bars in Code 128

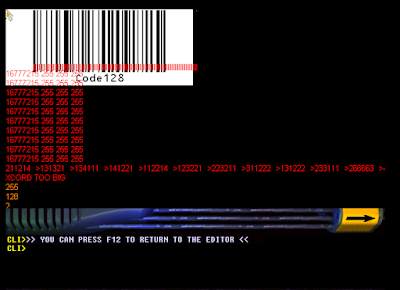
I was trying to decode a generated barcode by hand and it was just too hard. So why not use my favorite new language, darkbasic classic.

I load the bitmap and then just display the bar widths and manually look it up in the table at https://en.wikipedia.org/wiki/Code_128.

Quick and dirty but so much easier than trying to count pixels by hand...


So why only 107 symbols in Code 128?

Sometimes you just wonder why things have a certain number of possibilities. Like code 128 barcodes. Why does it have a certain # of symbols?

From https://en.wikipedia.org/wiki/Code_128

It's got a constant 11 bit width with 3 bars and 3 spaces. Each bar can be from 1 to 4 units thick.

So you have 6 bars and they can have 4 possibilities each.

You'd think it would be 4 * 4 * 4 * 4 * 4 = 4096 possibilities, but the number of units all has to add up to 11.

Let's write some javascript to do some counting for us:


and it dutifully gives us 216 possibilities.

If we remove half of those 216 taking away the reverse bit patterns, we get 108 which is pretty close to the 107 symbols that you can have in code 128.

Friday, August 31, 2018

darkbasic classic and warrenview

Years ago, there was this cool program called warrenview which would display pictures as a 3d plane that you could rotate around. I had a cd of darkbasic classic and decided to install it and start fiddling around. It's very idiosyncratic but it's fast and fun and a bit addictive to try things out and see what happens. I remember the old Amiga AMOS Basic and DarkBasic Classic (DBC) reminds me of it. It can be fiddly to get things working but it doesn't seem to crash.

DBC is a bit archaic (the built in editor is 640x480 even if you have a full HD monitor). PRINT doesn't scroll the screen when you hit the bottom of the screen or use a monospace font. Once you activate the 3d system it will tend to overwrite everything on the screen unless you disable the background with BACKDROP OFF. You can set things but not retrieve the same state, like SCALE TEXTURE. It's a one way street with write only and you have to remember what you set it to.

If you want to write text to the screen, the automatic refreshing system will overwrite it unless you refresh it every 60th of a second even when you use SYNC ON and SYNC. Putting in a WAIT 5000 or SLEEP 5000 will have the text disappear within the next 60th of a second.

Why do comments have to start with a backtick? Why not a single quote like QBASIC? (That one is hardwired, man! Must unlearn...)

And my personal favorite, when the editor is running (just editing your program, not running a program), cpu usage is 100%. (Why Lisa, why?)

Anyway, here's my attempt at recreating warrenview in DBC. There's something really satisfying about spinning the picture with the mouse at 60 fps.


Tuesday, July 3, 2018

Code 39 intercharacter gap

I was fiddling with my barcode scanner and an old UPS barcode.

It was obviously code 39 but when I made my own version of it using one of the online web barcode generators, the bars didn't look the same. The pattern was very similar but subtly different.

What I discovered is that the intercharacter gap is wide instead of narrow. According to https://en.wikipedia.org/wiki/Code_39, "Characters are separated by an additional narrow space."


I wonder if a larger intercharacter gap made it easier to decode years ago.


So here's the original barcode with a freshly generated version underneath for comparison.


Saturday, June 16, 2018

xrandr: why not just have --setcvtmode 1920x1080@60

I have fiddled with xrandr a lot and I wish that it'd be easier to just specify a resolution and refresh rate in one line.

Something like

xrandr --output VGA-1 --setcvtmode 1920x1080@60

instead of having to do:


$ cvt 1920 1080 60
# 1920x1080 59.96 Hz (CVT 2.07M9) hsync: 67.16 kHz; pclk: 173.00 MHz
Modeline "1920x1080_60.00" 173.00 1920 2048 2248 2576 1080 1083 1088 1120 -hsync +vsync


then copying and pasting the modeline into xrandr --newmode

$ xrandr --newmode "1920x1080_60.00" 173.00 1920 2048 2248 2576 1080 1083 1088 1120 -hsync +vsync

and then adding the mode to the VGA-1

$ xrandr --addmode VGA-1 "1920x1080_60.00"

and then finally actually setting the mode

$ xrandr --output VGA-1 --mode "1920x1080_60.00"


You can do things like use awk:

xrandr --newmode `cvt 1920 1080 60 | awk 'NR==2 {for (i=2;i<=NF;i++) printf("%s ",$i);}'`
xrandr --addmode VGA-1 `cvt 1920 1080 60 | awk 'NR==2 {for (i=2;i<=2;i++) printf("%s ",$i);}'`

but why not have it all in a single command, and maybe have an option for trying it out and reverting to the previous settings in 10 seconds, in case your monitor doesn't like it.


something like:

xrandr --output VGA-1 --setcvtmode 1920x1080@60 --trymode 10

That would make it much less cumbersome. Why does it have to be hard?